Authentication
By Default, we are using Firebase for auth, if you want to change it to Jwt for that follow below steps.
1. NextAuth
Select the NextAuth Demo folder
                  //packages/javascript/NextAuth
npm install
Folders And Files
Inside that folder you will get this file src > app > api > auth > [...nextauth] > route.js
//src > app > api > auth > [...nextauth] > route.js
import NextAuth from "next-auth"
import GoogleProvider from 'next-auth/providers/google';
const handler = NextAuth({
  // ... your change will be here
  providers: [
    GoogleProvider({
      clientId: process.env.GOOGLE_CLIENT_ID,
      clientSecret: process.env.GOOGLE_CLIENT_SECRET,
    })
  ]
})

export { handler as GET, handler as POST }
Setup Environment Variables
// this is your .env file
GOOGLE_CLIENT_ID="Your Id"
GOOGLE_CLIENT_SECRET="Your GOOGLE_CLIENT_SECRET Key"

NEXTAUTH_SECRET="Your NEXTAUTH_SECRET Key"
NEXTAUTH_URL="http://localhost:3000/"

GITHUB_ID="Your GITHUB_ID"
GITHUB_SECRET="your GITHUB_SECRET"
How To get Google Client Id and Secret Key ?
1) go to https://console.cloud.google.com/getting-started
2) Checkout the video : Watch
Video
3) You can create Github id and secret key and replace in .env file. (follow this step to create: https://authjs.dev/guides/configuring-github)
4) setup callback url http://localhost:3000/api/auth/callback/github while creating a id and key
5) Once you replace the id and secret key you just need to test the sign in page.
6) You can add any provider from this link : https://next-auth.js.org/providers/ you just need to add those into router.js/ts file
How To restrict any page if user is not signed in ?
curerently we targeted dashboard pages to restrct user
//just import this
import { useSession, signIn, signOut } from "next-auth/react"
export default function YourConst() {
  // extracting data from usesession as session
  const { data: session } = useSession()

  // checking if sessions exists
  if (session) {
    // rendering components for logged in users
    return (...your html)
  }
  return(...else html)
}
2. Firebase Method
For firebase, incipiently change in index.tsx file as per below mention.For more details about Firebase: https://firebase.google.com/
// -----------------------------------------------------------------------------------------
// File : src/index.tsx
// -----------------------------------------------------------------------------------------

import { AuthProvider } from 'src/guards/firebase/FirebaseContext'; // change is here

const root = ReactDOM.createRoot(document.getElementById('root') as HTMLElement);
root.render(
<Provider store={store}>
  <Suspense fallback={<Spinner />}>
    <BrowserRouter>
      <AuthProvider>
        <App />
      </AuthProvider>
    </BrowserRouter>
  </Suspense>
</Provider>,
);

// -----------------------------------------------------------------------------------------
// File : src/guards/authGuard/UseAuth.tsx
// -----------------------------------------------------------------------------------------
import { useContext } from 'react';
import AuthContext from '../firebase/FirebaseContext';

const useAuth = () => useContext(AuthContext);

export default useAuth;
Steps for Generate key
- click on “Go to console” display on the right side on firebase account.
- Then after Click on add Project.
- After Display popup menu, Enter Project name, Select Country And Click on Terms and condition Checkbox.Click on Create Project Button.
- Now, Display The Firebase Admin panel
- In Left Panel, Click on Develop option. Now Click on authentication link.
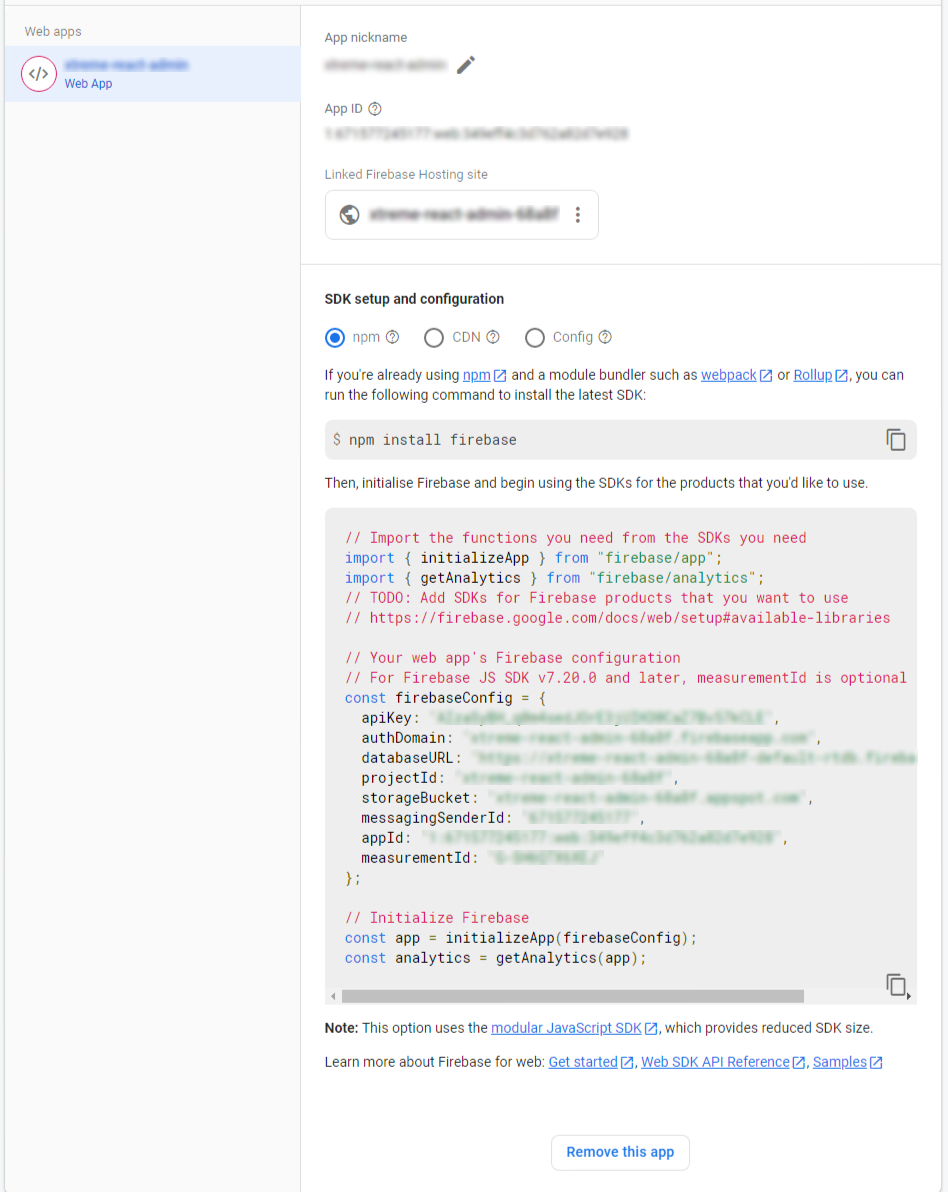
- Click on the “Web Setup” button.
- Now, copy the configuration and change in Flexy-react project in ‘src/components/Firebase/firebase.js’.
- Now go to sign-in Method tab.Enable Email/Password and Anonymous in sign-in providers.
- Now, Click on database link from left Panel.
- Click on the create a database button.
- Display Popup in Select “start in locked mode” and Click on Enable Button.
- Now, select real-time Database.
- Click on rules tab. change the read and write rules from false to true.
How to add key into template ?
// -----------------------------------------------------------------------------------------
// File: src/app/guards/firebase/Firebase.tsx
// -----------------------------------------------------------------------------------------
const firebaseConfig = {
  apiKey: 'API_KEY',
  authDomain: 'AUTH_DOMAIN',
  projectId: 'PROJECT_ID',
  storageBucket: 'STORAGE_BUCKET',
  messagingSenderId: 'SENDER_ID',
  appId: 'API_ID',
  measurementId: 'M_ID',
  databaseURL: 'DATABASE_URL',
};